Facial Recognition & Selfies

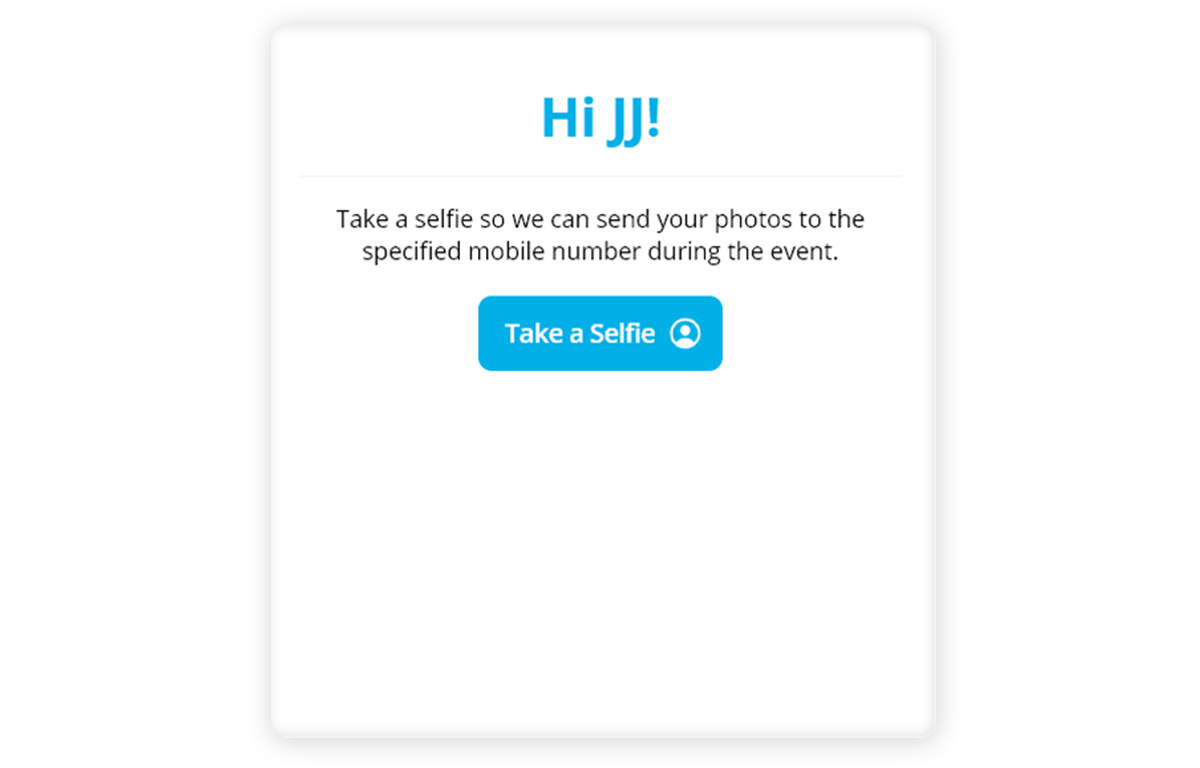
Welcome back to our new blog series, facial rec and chill. This installment will look at how our facial recognition can be activated through the magic of the selfie. For anyone not aware of what a selfie is, this is the task of stretching out your strong arm to take a picture of your face with a smartphone’s front camera.

Thanks to our smartphones, matching subjects to a reference photo has never been easier. If you are working an event with teenagers or adults, you could take full advantage of our selfie facial recognition feature. This may be the one time we encourage teenagers to take out their phones!

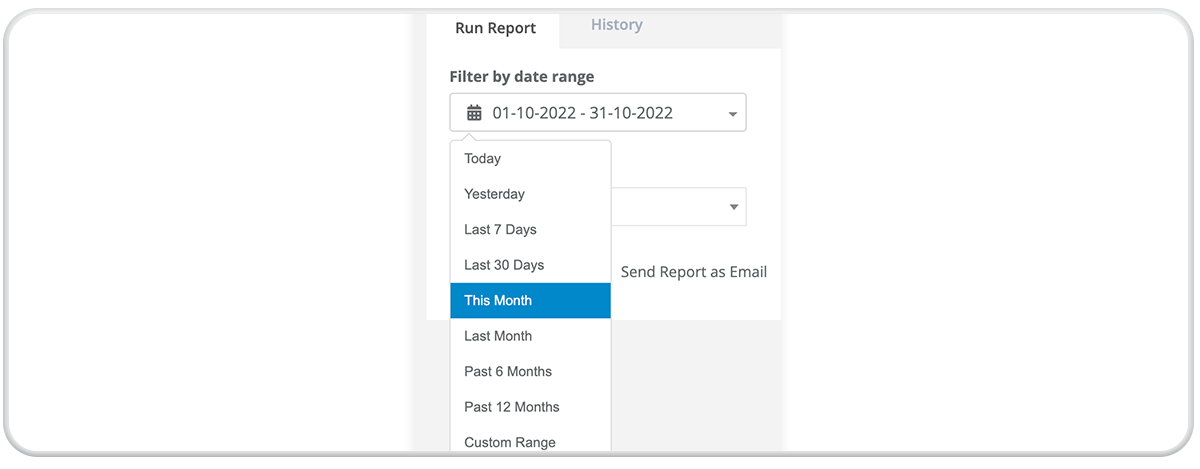
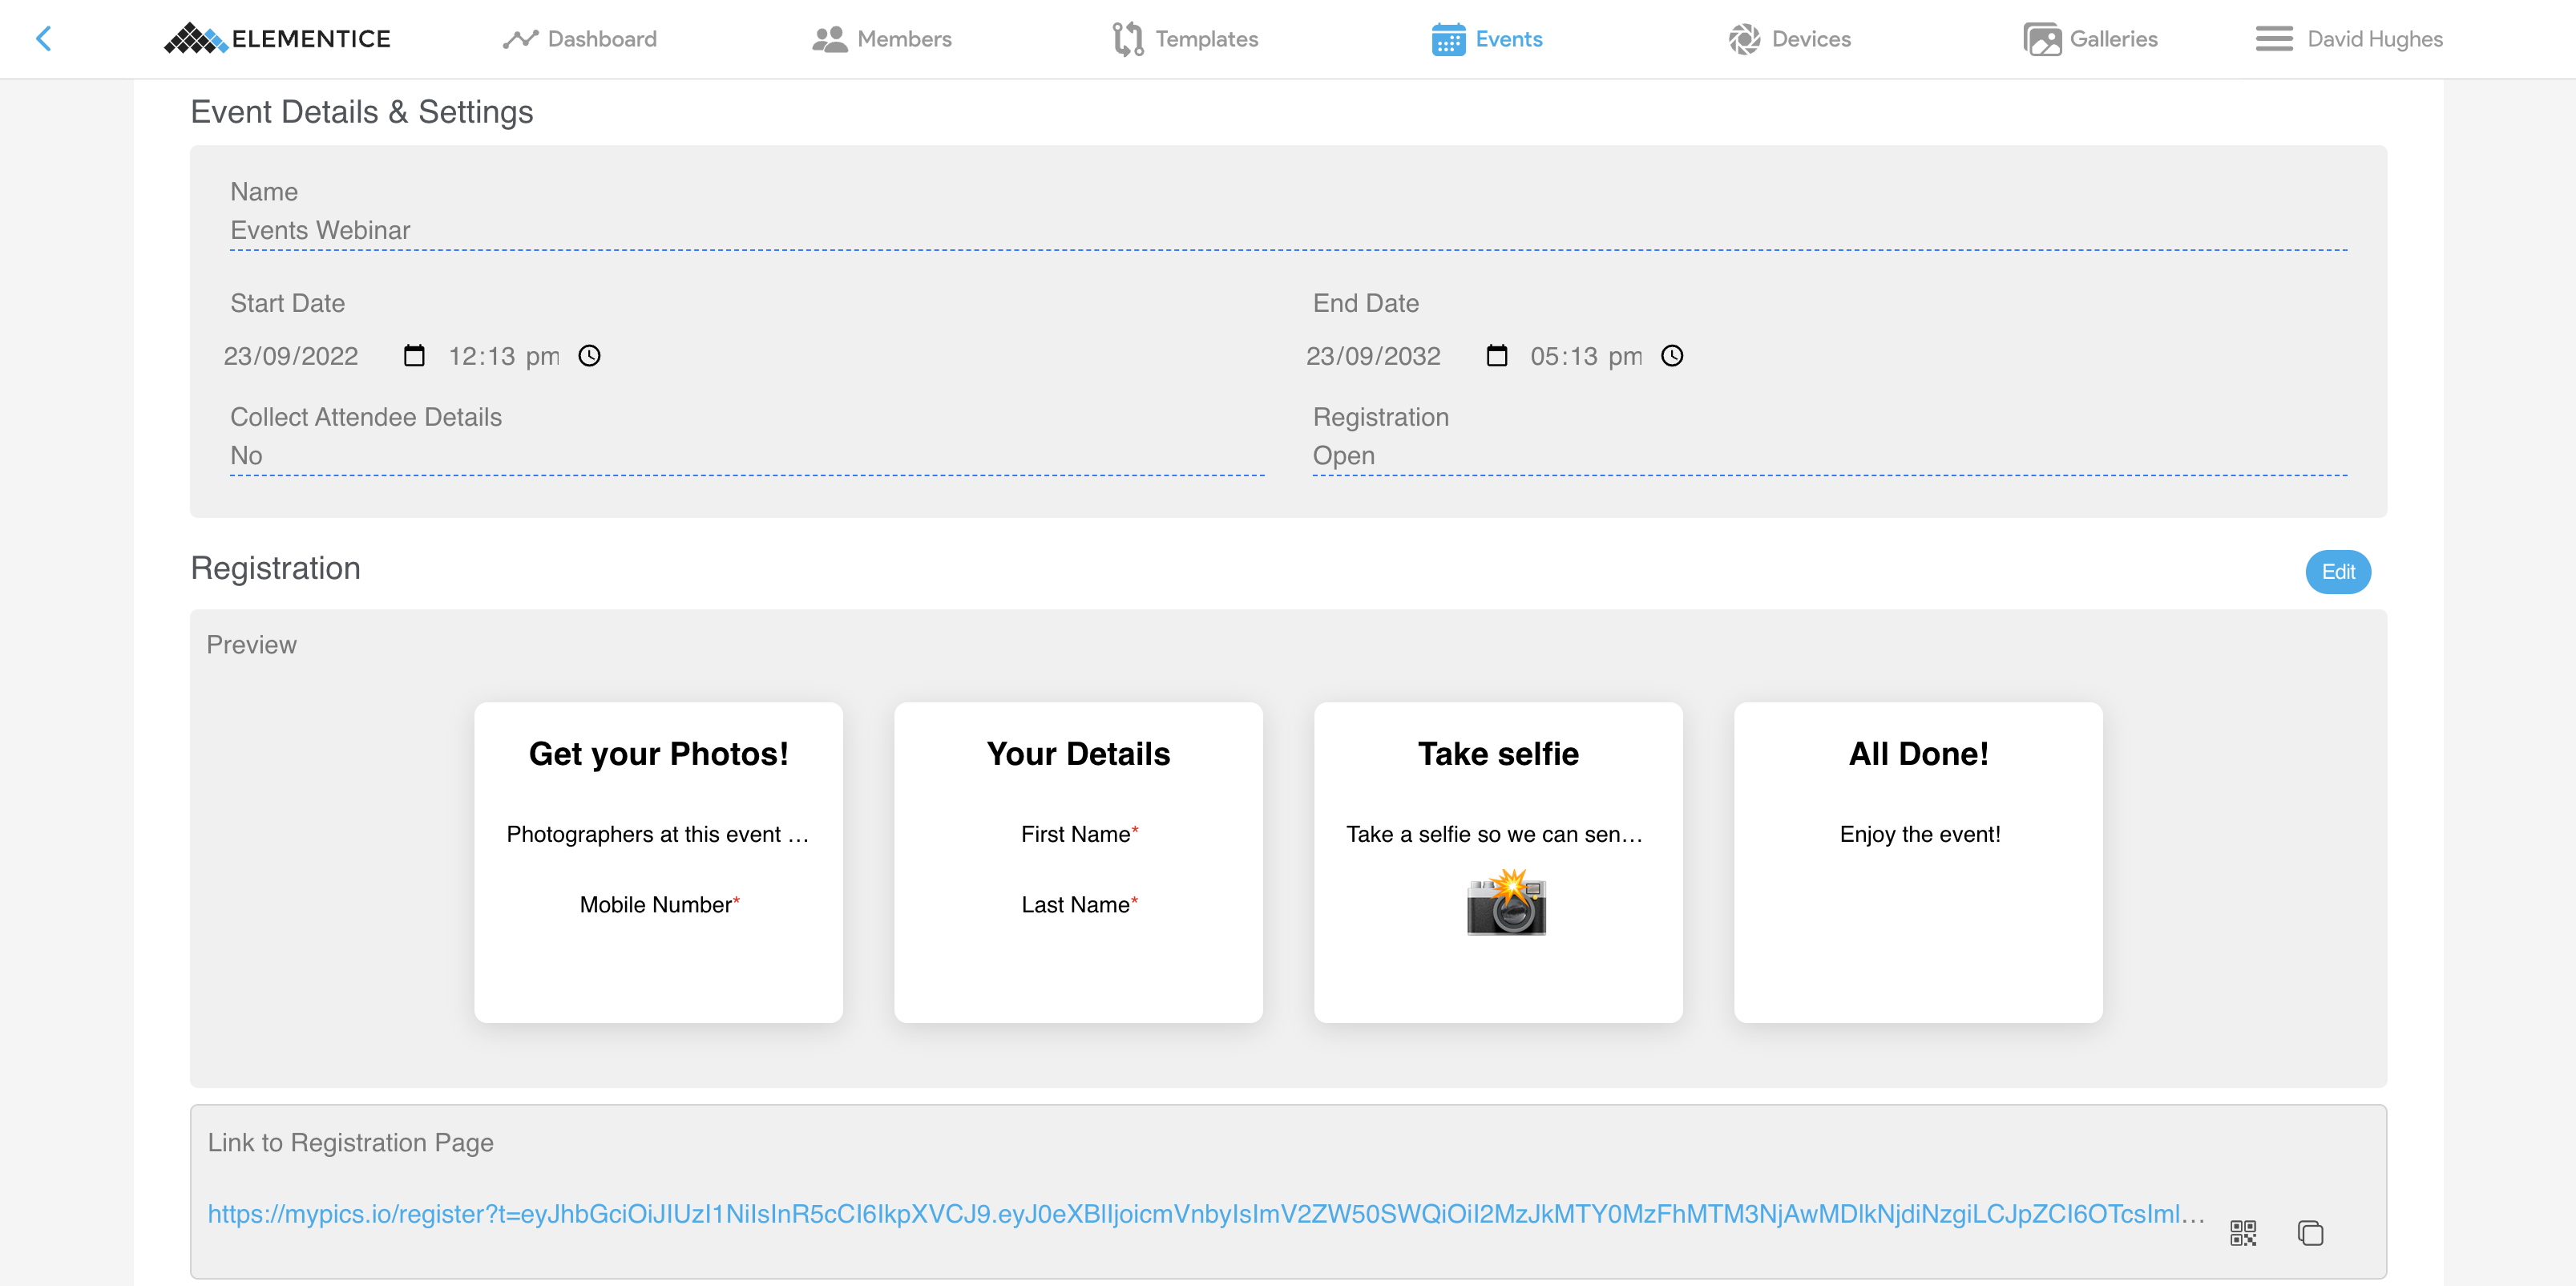
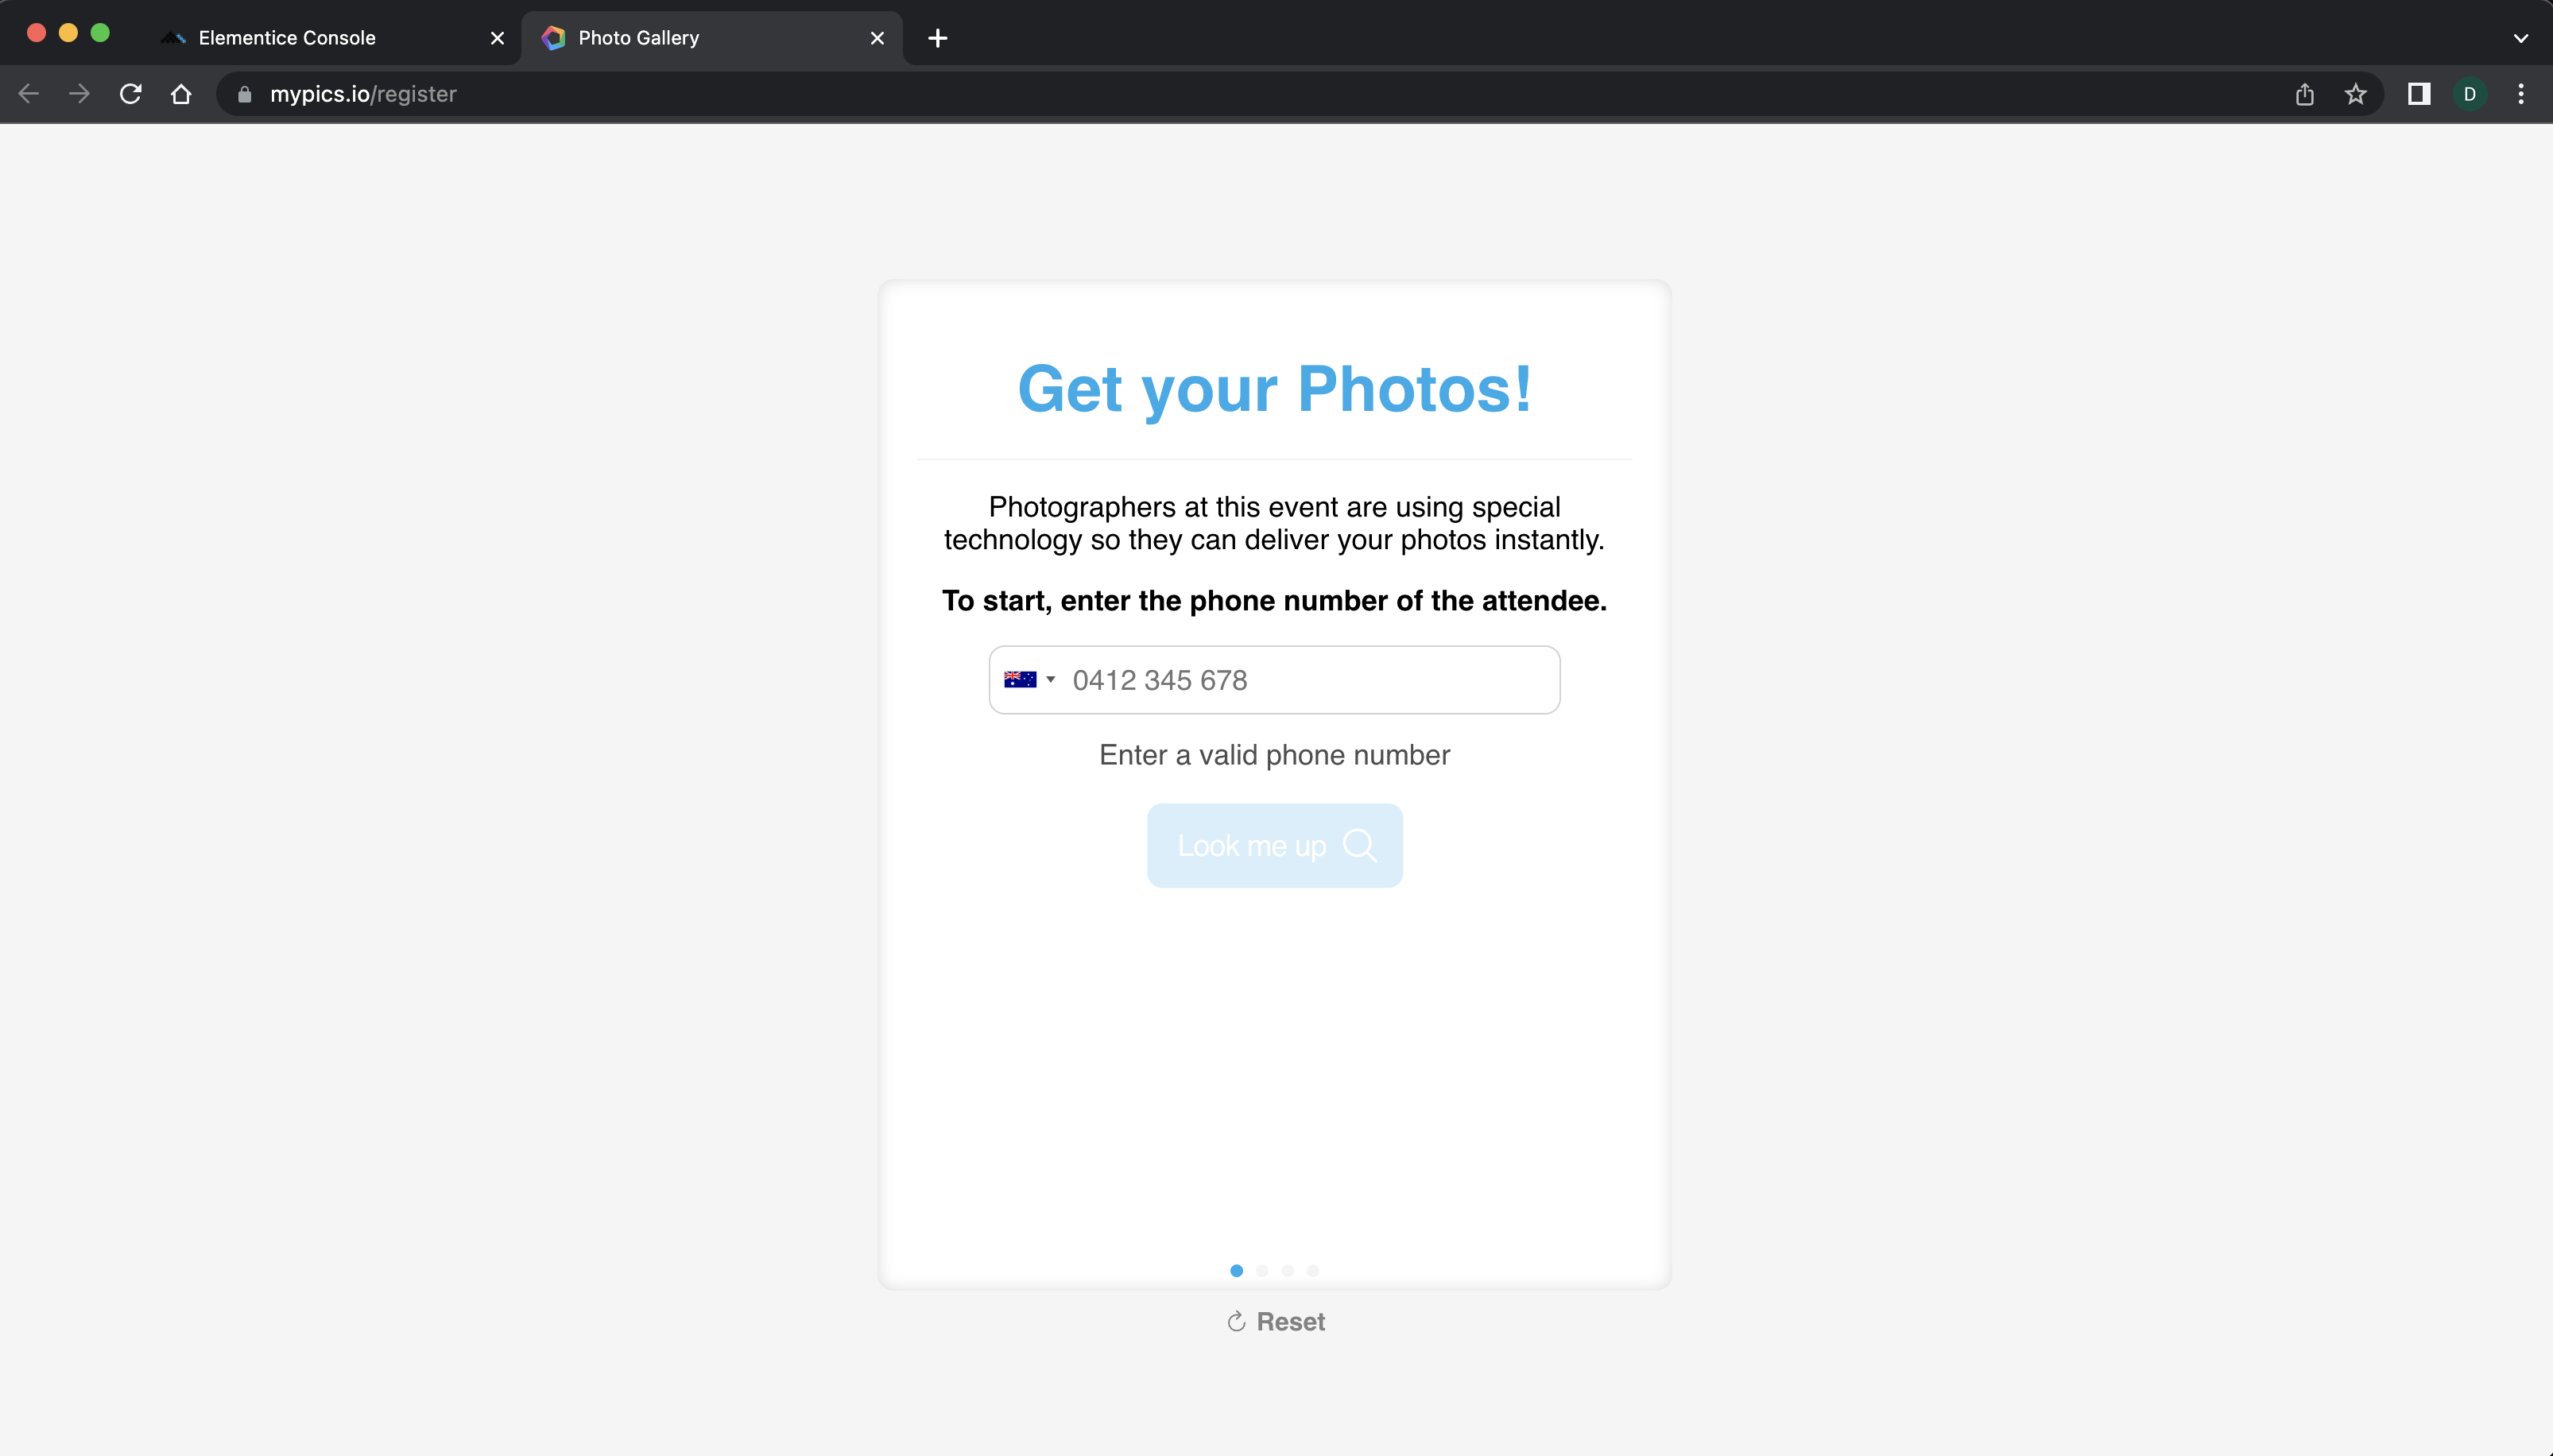
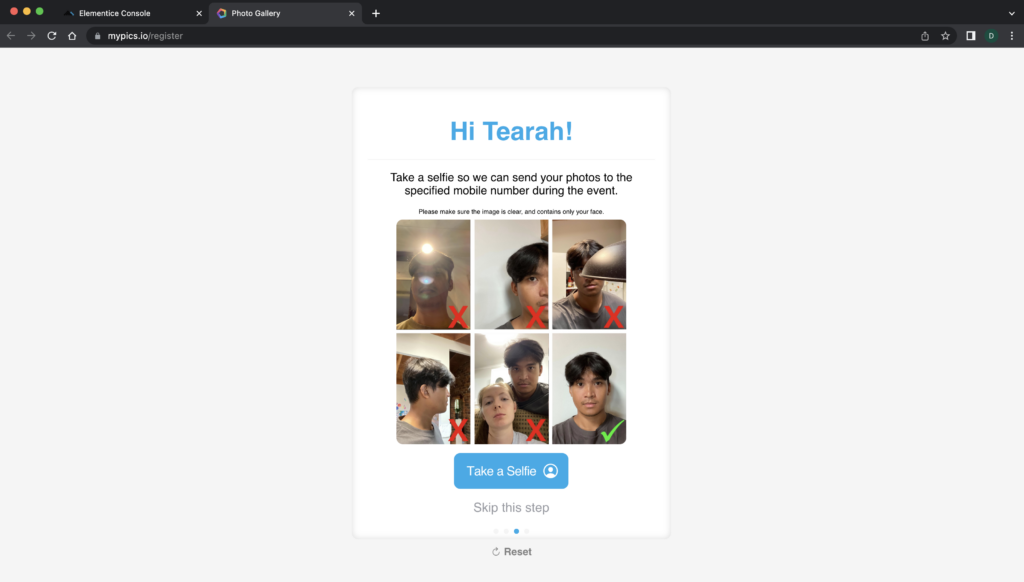
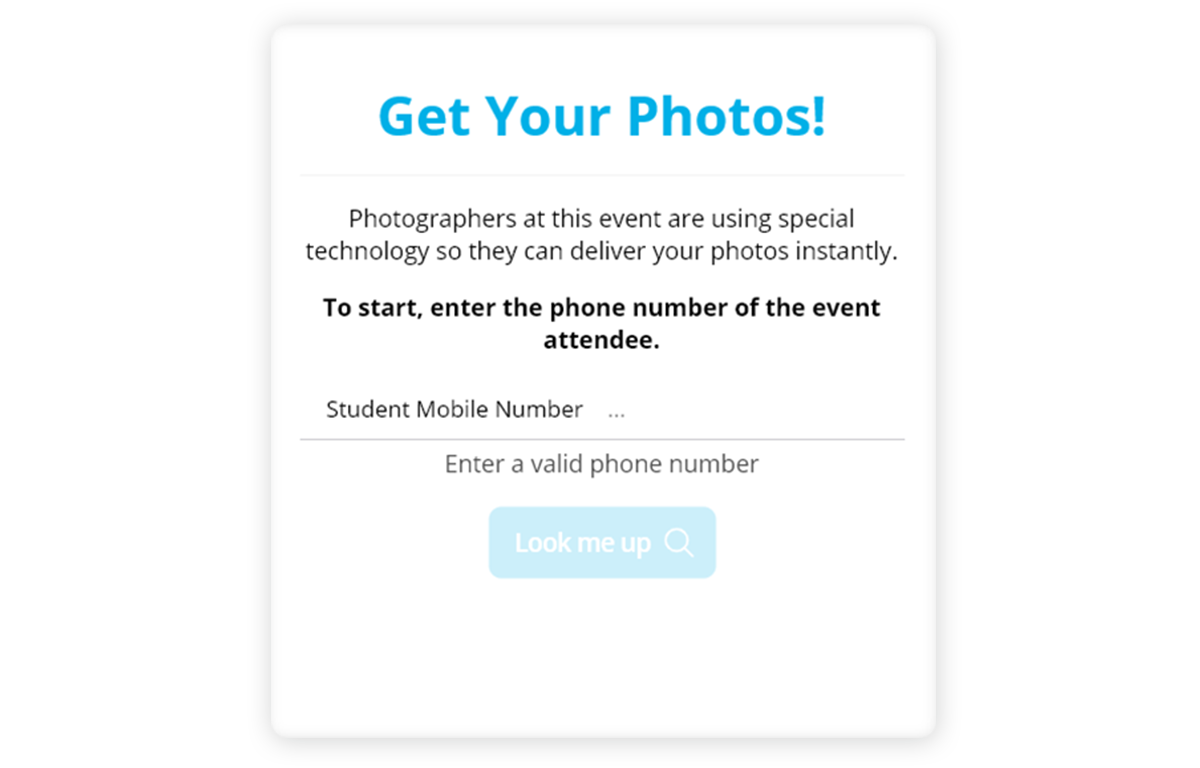
So, how does it work? First, send out the QR code via the school or event organizer pre-event and have subjects register their selfie to the system. You could even display a QR code at the event so subjects can register during the swing of things. Using facial recognition, the selfie is then used to identify any pictures of the subjects at the event.

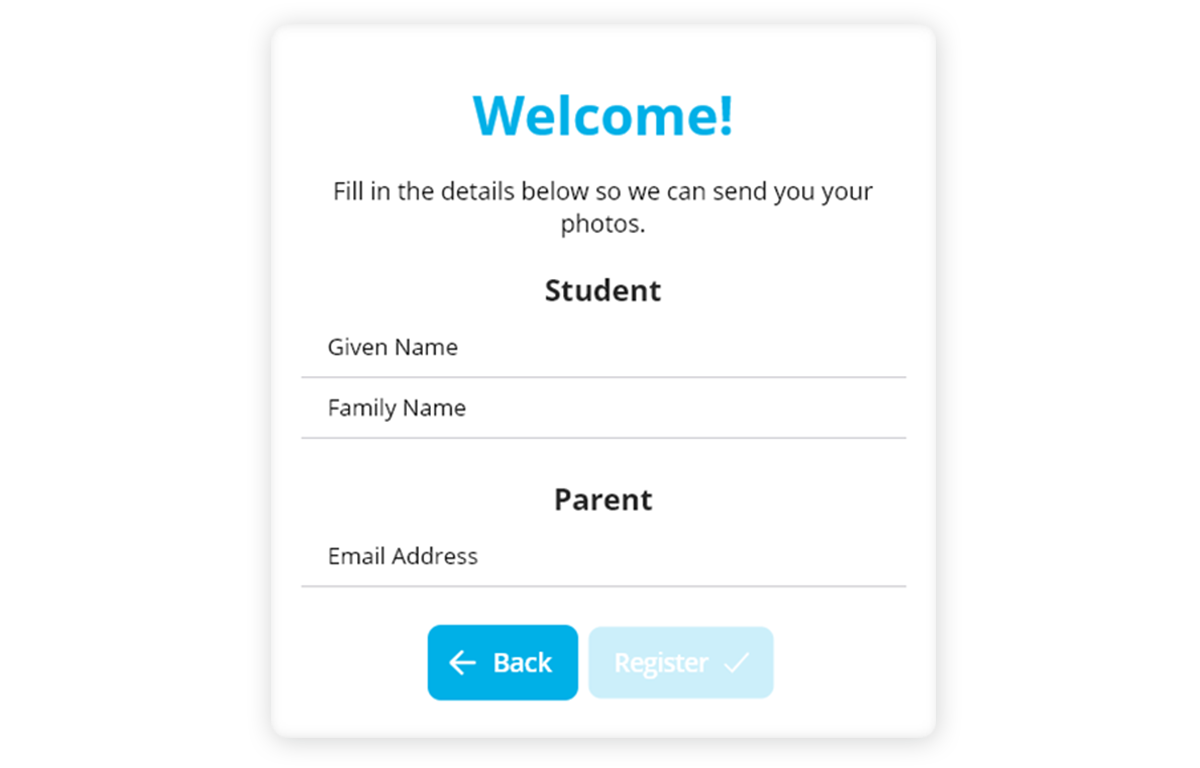
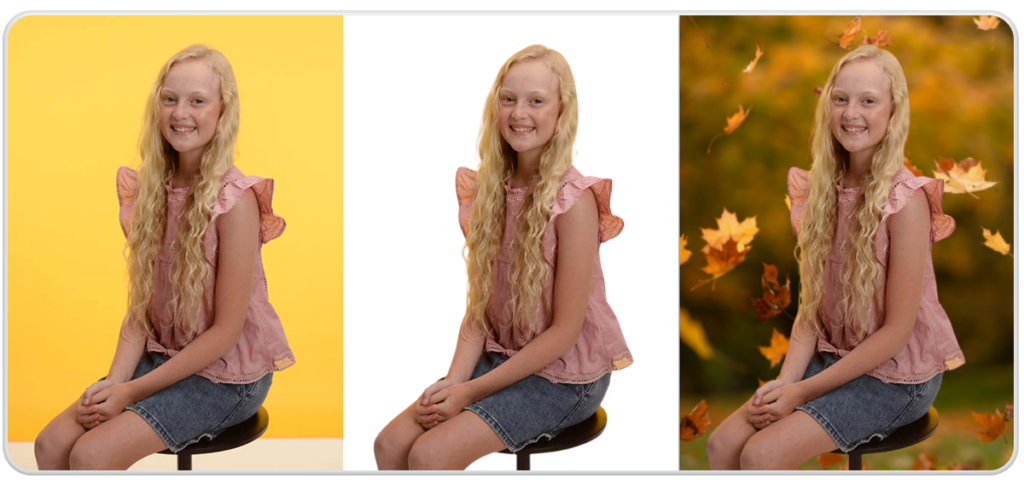
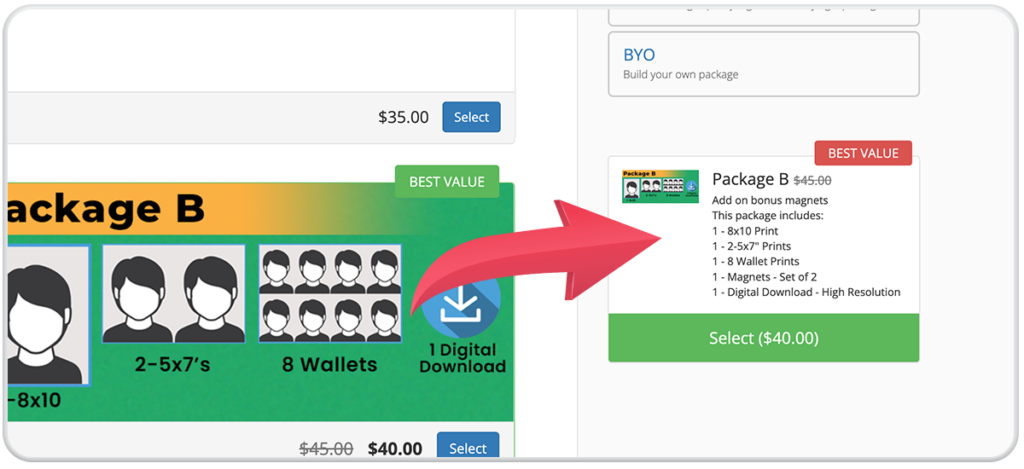
The best part about this feature is selfies can be registered pre, during, or post-event. Once the selfie is uploaded, facial recognition will get to work at organizing photos into galleries. Individuals in a combined photo will both see a copy of the photo inside their personal galleries. This is a particularly great workflow for senior jobs, as obtaining that reference image is as easy as snapping a selfie. While you work the room taking amazing pictures, the system will get to work and send an SMS to parent/subject phones, letting them know they have “photos available to review/buy.”

This is the future of event-based photography work. If you would like to join us in the future, you can find out more information by watching this webinar or booking a demo. Chat soon!

Facial Recognition & Reference Images

Welcome to the most binge-worthy new series on the market; our facial recognition blogs. This blog will be the first of many to take you through the many workflow cases we have that use facial recognition. Capture, Studio, and Commerce all use facial recognition to automate your workflow. So put on your comfiest pants, grab a snack, and get ready for facial rec and chill.

Let’s begin episode one with one of our most popular use cases, facial registration using reference images. Like any good story, we need a riveting plot. Let’s paint the scene.

You’re knee-deep in a job, snapping away at the most exclusive kindergarten event. Everything is running smoothly and as planned. They say never to work with kids. Well, they’ve obviously never used facial recognition and Capture.

As the children are dropped off for the day, one of your photographers is set up near the entrance, ready to take a reference picture. As the Client sent you the subject data beforehand, you’ve created QR codes pre-event. While the parent/guardian drops off the child, the photographer scans the linked QR code and then snaps a photo. This reference ID image is immediately linked to the subject data.

Let’s get back to your whereabouts. You are taking some roving pictures, getting your power stance on. As you take cute candid photos of the kids playing, the images are sent to individual galleries. How is this magic happening? Facial Recognition. Thanks to the reference photograph taken on the way in, the photos will be linked to their subject gallery each time a child’s face is spotted. No need to re-scan the QR code; you can now put the reader down. Brilliant right? As the event carries on, parents will receive an SMS link to the gallery so they can watch the photos trickle in. You also have the option to set the gallery live after you perform your post-production tasks, so it’s a win-win all around!

That’s just one use case. Happen to get the reference pictures before the event? No problem. You can set this reference picture up beforehand so that when you get to the event, you can start snapping away and let facial recognition do the sorting. ID photos can be taken before, during, and after an event. Now that’s what I call workflow without the work!

In the workflow outlined above, any photos identified with a registered face are sent to the subject’s gallery, ready to be purchased. All you need to do is focus on taking the amazing pictures you were hired to take. Awesome.

Reach out today to organize a demo or find out more information.

Knowledge Base Tour

Think of our knowledge base area as your hitchhiker’s guide to Fotomerchant. Don’t panic; our knowledge base area will guide you. Catch up on new features, learn about onboarding, or scrub up on some products you are currently using. Our knowledge base, or as the cool kids call it, the KB area, has everything you could dream of, so why not tag along and take a tour of the Fotomerchant knowledge base? Oh, and if in doubt, the answer to every question you have is 42.

Why Good Documentation Matters

We strive to provide our customers with value, and this extends to the resources we provide. Good documentation can make you feel at ease as you learn about our new products and systems. Understand the products you are using and take charge of your workflow. If you are a long-term customer of ours (congrats, we appreciate you), our platform may have changed within the past few years as we aim to improve on existing features. Our knowledge base, therefore, acts as a place for you to keep up to date with improvements and new features we are releasing.

Our knowledge base team is excellent at managing this space and ensuring it is always up to date.

Tour of the KB Area

Let’s start with the location of the knowledge area. First, go to the https://fotomerchant.com homepage. On the top bar, click on the resources drop-down. Next, click on the knowledge base area. We recommend bookmarking the KB area for easy future access.

Once in the knowledge base area, you will notice a search bar followed by direct button links. If you already know what you require documentation on, add some keywords to the search bar.

If you feel a little lost and need general advice, fear not. You can easily choose which area you need some help in. For example, if you need help with your knockouts in Studio, you can go ahead and click the Studio application link. This area is an excellent launchpad for you to begin uncovering all the little features that make Fotomerchant great. Go forth and explore!

Support Information

I contemplated including this in the KB tour, but this area deserves its own subheading because it’s incredible. The support information area is where you can keep up to date on our upcoming features, clued up on our Fotomerchant jargon, request new features, and learn the best way to receive support. I’ll expand on how to ask for help towards the end of this blog.

If you click on the recently released features link, you can ensure you know all the latest features we have released. Some of these features may have slipped under your radar, so it’s a great way to stay updated. You may notice a reference to a coming soon area in the image below. Looking into the Fotomerchant crystal ball, stay ahead of the curve as we show you what features and exciting developments we have on the horizon.

Have a feature you would like to see from us? Throw your ideas our way and fill out the feature request form. Woah, hold your horses! Read the submitting a feature request document first to ensure you are clear in your feature wishes. Also existing in the support information area, the submitting a feature request document provides you with the tools to frame your request in the best way possible. Clear, concise communication is critical here!

How Our Documents Are Structured

Let’s open up one of these bad boys and run you through how we structure our documents. Consistency is key here. Our documentation team works hard to make these articles consistent in how they present information. We believe a clear structure is the best way to pass on information. So whenever you open up one of our KB articles, rest assured that it will follow the same reliable structure.

Let’s take a look at an excellent beginner doc, studio set-up.

Our documents begin with simple tags showing you which applications the document covers. Here, the document falls into the Studio and Commerce areas. You can follow the document by clicking the top right-hand follow prompt to see any changes/updates that might occur on this page.

As you can see in the screenshot above, each document begins with a quick intro to the topic covered. After you have read this short intro and decided on whether you want to proceed (or any other steps you might need to take beforehand), you can jump to different parts of the page with the hyperlinks. Feel free to scroll if you want to devour the whole tasty document. We hope you are hungry to learn!

In tiny bite-sized morsels, consume your information in a way that is effective. Follow simple but clear prompts to better understand the product. Happen to be an auditory learner? We got you covered. Watch quick informational videos that outline the topic with easy-to-follow screen shares.

Let’s skip ahead down the document. At the bottom of the page, you will see this grey block providing a handy prompt to continue your journey for knowledge. Still hungry for more or have questions remaining? Click through and learn more.

Finally, freshen your memory with your recently viewed articles or browse some related articles.

Have More Questions?

If you have found a gap in our knowledge base, we’d love to hear from you. As I mentioned above, you can find any documents relating to support help in the support information area.

If you are a current customer of ours, reach out to our friendly slack team. Quite often, when our customers reach out over slack, we find the information they are looking for already exists in the KB base. If we do find some missing information, we will work to get you the information initially and then build the documentation. If you aren’t used to slack, we recommend you look at to get the best from our support team. Once you better understand the slack platform, look at the support request area to provide our customer support team with the information they need to answer your question as soon as possible.

Not a Fotomerchant customer, but still need more information? Why not book a demo with our sales guy Peter? Have a friendly Canadian run you through the ins and outs of each product via a video call. Now that’s what I call a win-win situation!

Thanks for tagging along on our knowledge base area tour! We hope you take a look through the KB area; it’s full of great tips and tricks that will help to streamline your workflow further.

See ya!

Generating and Analyzing Reports

There’s nothing we love more here at Fotomerchant than cold-hard data. What if I told you that this data doesn’t need to feel so cold? Our reporting area will welcome you with warm arms to uncover the magic hiding in your data. Easily export out pre-made data reports and plan for your studio’s future with informed decisions. Track your performance and make changes where needed. Now that’s more like it! Let’s take a look.

Where can I see these reports?

Once you are in your studio’s commerce account, navigate to the left panel and click on reports. Now prepare to be amazed…

Welcome to an absolute treasure trove of data reports! As you can see, this list of reports gives you a quick run-through of each report’s purpose. So take a quick look, and please reach out if you have any questions about the reports below!

Before we sink our teeth into some details regarding the reports above, let me show you how you can use the reporting area to pull data specific to certain dates, seasons, or categories. Once you click on the report you wish to export, you will be greeted by a page that looks like this:

As you can see in the image above, you can filter the data to pull the information you need. No more combing through long CSV files for specific dates or seasons; we got you. Instead, you can scope the data collected yesterday, last month, or for a custom range.

Once you have decided on your date range, you can filter the data depending on the category (e.g., sport or underclass), season (e.g., Fall or Spring), client, and session. This will allow you to be precise in your exports.

Once you have defined your scope, you can move to downloading the data. Yay! Click Run Report first to populate the data.

Now click Download as CSV. Happy data analyzing!


If you are pulling a large time frame of data, we recommend sending the data via email. You can send this to multiple emails (as long as you permeate each one with a space).

Now that we have covered the filter area and downloading your data let me unpack a few of the reports we offer. Rather than go through each report, I will run you through a few more popular reports in greater detail.

Session Sale Report

This report shows you everything about a session. You can compare whether you have more prepaid or post sales and analyze the order numbers. If you want to view all this information about all sessions within a season, e.g., Fall 2022, you can easily filter the reports area to generate data for all sessions in this season. Easily sort the CSV file via the session column and compare the data between sessions. Uncover some seriously awesome insights about how your session orders stack up next to each other.

Here are all the columns included in that CSV report:

  • Client
  • Client External Reference
  • Client Access Code Client
  • Territory Code
  • Session
  • Session External Reference
  • Session Access Code
  • Pre-orders
  • Re-orders
  • Orders
  • Canceled Orders
  • Retail Inc Tax
  • Retail
  • Tax
  • Pre-orders
  • Retail Inc Tax
  • Pre-orders Retail
  • Pre-orders Tax
  • Re-orders Retail Inc Tax
  • Re-orders Retail
  • Re-orders Tax
  • Merchant Fees
  • Transaction Fees
  • Digital Fees
  • Refunds
  • Season
  • Season External Reference
  • Season Code
  • Category

Order Report

This report shows you all data associated with an order. You can see their order reference, additional emails attached to the subject, and more. This information is handy when you need to investigate a customer service call regarding a customer order. Another great way to use this data is to compare customer payment methods. This can help to illuminate the way customers order and typical payment methods.

Expand the box below to view all the data columns you can export out in this type of report:

  • Date Order Reference

  • Type

  • Customer Name

  • Customer Email

  • Ordered Items

  • Ordered Image Options

  • Payment Method

  • Payment Status

  • Total

  • Packages Shipping

  • Tax

  • Tax Rate

  • Refunds

  • Transaction Fee

  • Digital Fee

  • Merchant Fee

  • Coupon Discount

  • Packages Discount

  • Shipping Discount

  • Shipping Method

  • Shipping Method Code

  • Shipping First Name

  • Shipping Last Name

  • Shipping Address 1

  • Shipping Address 2

  • Shipping City

  • Shipping Zip Code

  • Shipping Phone Number

  • Shipping State Shipping Country

  • Billing First Name

  • Billing Last Name

  • Billing Address 1

  • Billing Address 2

  • Billing City

  • Billing Zip Code

  • Billing Phone Number

  • Billing State

  • Billing Country Client

  • Client External Reference

  • Client Access Code

  • Client Territory Code

  • Session

  • Session External Reference

  • Session Access Code

  • Stage

  • Season

  • Season External Reference

  • Season Code

  • Category

  • Catalog UID

  • Catalog

  • Subject First Name

  • Subject Last Name

  • Subject External Reference

  • Subject Password

  • Subject Email

  • Subject Email 2

  • Subject Email 3

  • Subject Email 4

  • Subject Teacher

  • Subject Grade

  • Subject Date of Birth

  • Subject Gender

  • Subject Home Room

  • Subject Subject ID

  • Subject Library ID

  • Subject Cafeteria ID

  • Subject Organization

  • Subject Order Form Barcode

  • Subject Prefix

  • Subject Jersey Number

  • Subject Year

  • Subject Position

  • Subject Period

  • Subject Track

  • Subject Custom 1

  • Subject Custom 2

  • Subject Custom 3

  • Subject Event Date

  • Subject Parent 1 First Name

  • Subject Parent 1 Last Name

  • Subject Parent 1 Email

  • Subject Parent 1 Phone Number

  • Subject Parent 2 First Name

  • Subject Parent 2 Last Name

  • Subject Parent 2 Email

  • Subject Parent 2 Phone Number

  • Subject Address Address 1

  • Subject Address Address 2

  • Subject Address City

  • Subject Address Zip Code

  • Subject Address Phone Number

  • Subject Address State

  • Subject Address Country

Yearbook Order Report

Do you offer yearbook photos? Yes? This report will be of great use to you. Export this data to see all orders made with a yearbook-assigned product. This report will help you stay on top of all your yearbook orders and keep your workflow steaming straight ahead. Data has the potential to both enlighten and, in this case, keep you organized.

  • Order Reference

  • Order Date

  • Customer Name

  • Customer Email

  • School

  • Subject First Name

  • Subject Last Name

  • Subject Home Room

  • Subject Grade Subject Teacher

  • Billing First Name

  • Billing Last Name

  • Billing Address 1

  • Billing Address 2

  • Billing City

  • Billing Zip Code

  • Billing Phone Number

  • Billing State

  • Billing Country

  • Shipping First Name

  • Shipping Last Name

  • Shipping Address 1

  • Shipping Address 2

  • Shipping City

  • Shipping Zip Code

  • Shipping Phone Number

  • Shipping State Shipping Country

  • Shipping Method

  • Shipping Method Code

  • Order Status

  • Discount Code

  • Product

  • Product Cost

  • Product Tax

  • Quantity

  • Before Discounts

  • Discounts

  • Customer Paid Order Tax

  • Shipping Total Refund Total

  • Order Total

The reports I covered above are truly just the tip of the iceberg. Some other useful reports include the; product sale report, the visitor report, and the subscriber report. For example, the product sale report is a fantastic example as it allows you to see the popularity of certain products. In addition, this report will enable you to tailor your shopping cart to provide products that customers want to see.

With great data comes great responsibility. So go forth and generate some data to uncover the mysteries of your customers and start backing your studio decisions with evidence. As always, you can reach out to us if you want more information on a specific report. That’s all for now.

Running Events 101

Imagine this. Colleagues push together to get snapped, and lanyards swing to and fro on the dance floor. There is an undeniable buzz in the room as the networking event kicks off in full swing. So why wait for this excitement to die down? Start selling images instantly while your eventgoers are feeling #alive. Nothing beats the excitement of seeing your pictures being dispersed in real-time.

Let me walk you through how the combination of facial recognition and capture device can have event-goers register their faces pre, mid, or post-event and instantly be linked to their images.

Better? Faster?

Yep. All of the above.

Register

The magic of our facial recognition starts here, with the registration step. Pre-event, you can have the event organizers send an email and SMS with a direct link to a super simple registry page. Here on this page, you can choose which information to collect from your subjects. Choose which details you want to add, e.g., grade, last name, or business name, every photoshoot is different, so this is customizable. Oh, and yeah, we support international numbers. Please note an individual phone number per person is required to register.

Once the subject enters all their information, they will go through a small guide that shows what not to do when capturing a selfie. This selfie will be used as a base image to identify the person. Yes to a clear front-lit image, no to a selfie taken with a group of celebrities at a miscellaneous award show.

They take a quick snap of their unique face, and boom, using facial recognition, the system will find all images taken that show that face. Pretty neat, huh? No need to manually sort through photos. Let the algorithm do the legwork for you. Welcome to the future!

Can’t disperse this register link ahead of time? Well, sorry about your luck…just kidding! You can have event goers register mid and post-event. Easily print out the QR register and display it in the venue, so all customers need to do is whip out their phones and scan to register. Once an image is submitted, they get a confirmation SMS, and then they’re off to throw down some groovy moves on the dance floor. One cool aspect is that they can still be identified if the customer registers after their image is taken. So you can leave this registration open for as long as you need and capture those busy customers post-event.

Capture. Sell. Smile.

As you snap, snap, snap away, hear the bing, bing, bings of customer phones as their images are instantly delivered. Warning: Customers may become distracted on their phones as they scroll through pictures of themselves and begin to place orders. Sounds like a good problem to have, right? Customers will be linked only to images that they are in. There is no need to scroll endlessly down extensive galleries to find the five photos of yourself with your same old awkward smile. Have them delivered straight to your customers!

You can tweak this SMS and link to say whatever your heart desires:

You can easily search for specific customer images by filtering via their face and view the image count of their pictures. If a bad selfie was initially taken by the subject when first registering, you can quickly problem-solve this.

Of course, this type of system is not exclusive to business networking events. You can use this for graduation ceremonies, proms, comic con, and much more! If you are photographing sports events, facial recognition can be used within limits; of course, if a helmet obscures the face, this will cause issues with identification. In situations where the face may be obscured, gallery cards can become an option.

Well, that’s about all I wanted to say about facial recognition and capture! If you are entirely new to a few of the terms I mentioned in the blog above, we have an excellent knowledge base where you can learn more about capture, facial recognition, and how to adjust the SMS message and gallery cards. Our knowledge base is constantly being updated with the addition of new releases that will help to clear up any remaining questions you may have. We also have a webinar on this topic. Please reach out if you would like a demo or to learn more. Ciao!

Gallery Notification Emails

We always have our ear to the ground here at Fotomerchant, and one of the biggest concerns that keeps on arising is, “how on earth do I get customers ordering online?” Our answer to that is always – gallery notification emails. It is as simple as that. Reach out to customers via email marketing and allow parents easy access to their cart using a direct button link. Oh, and we can automate this. When we say workflow without the work, we mean it. Automated galley notification emails so easy you don’t even need to lift a finger. Amazing right?

We understand that many studios require email marketing to be triggered at different stages in their workflow, depending on their editing system. As a response to this, we set up many different triggers that can send off your marketing depending on what works for your studio. Use it whichever way works best for you…unless you need us to do foot massages, we will politely decline this offer.

https://teensexonline.com

dumanbet

asyabahis

pinbahis giriş

sekabet

olabahis

maltcasino

faffbet

radissonbet.info

jetbahis

rexbet

1xbet

What is a Gallery Notification Email?

Before we dive head first into the exciting triggers that can send off your gallery notification emails, let me show you what this email entails. Our gallery notification emails include your striking logo, a direct address to the subject’s first name (if applicable), and a simple call to action prompting the parent to click the button for a direct link to their cart. We also populate the subject password in the email if the parent needs to add a sibling to the order.

You can, of course, customize the text in the email as you please or use the generic example we have above!

Gallery Notification Triggers

Emails being automated is all good and well, but what makes a difference is having control over the point in your workflow that triggers the emails. No two studios’ workflows are the same, so we have a few triggers you can choose from to ensure your emails are sent at the correct time. Let me take you through it.

Subject Created Trigger

A subject-created trigger will occur as soon as an email is imported into Fotomerchant alongside subject data. The delay you choose for the emails to send after this trigger occurs can range from 10 minutes to 6+ days. Deciding to delay all depends on how long you usually take to import images. If you are looking to use this trigger to notify parents their images are online, I would recommend you take a look at the image added trigger below instead.

Subject Image Added Trigger

This trigger is pretty self-explanatory; if you upload images to a subject gallery, emails will begin to send. Once again, we can set any delay you would like for this, from as little as 10 minutes to 6+ days, it is customizable to suit your workflow needs. You may require a larger delay if you edit images after you import them into Fotomerchant, and we can account for that no problem. The email will be set up to only send once per day to not spam your customers with an email every-time an individual image is added. No one likes to be spammed, so let’s not put your customers through that.

Stage Change Trigger

This trigger occurs when a stage is either set active or changes over. For example, if you had a pre-pay stage where you did not want to gallery notification email to send out, we could set up the emails to send once you have activated the proofing stage. If you need some more information on what stages are, click here to read another blog post that will run through this feature.

Manually Triggered

This type of trigger is not automated, so it will require a Fotomerchant team member to trigger the emails for you. We usually encourage this setup if you are still working out your workflow; this will prevent any accidental emails from being triggered. While you sort out your internal workflow and adjust to our new system, let us take care of the email triggering.

So what are you waiting for? Link parents to their shopping carts easily via our automated gallery notification emails. Please don’t hesitate to reach out if you require more information on anything mentioned above.

Abandoned Cart Email

You sit down to make an order, but then a bird flies in the room, the baby starts crying, and a storm begins while the washing is still out on the line! Life happens. Customers often have their time intercepted by an array of distractions that prevent them from completing their orders. But, sometimes, all it takes is a little nudge, and boom, they have ordered some prints! Abandoned cart emails are one of the oldest tricks in the book and act as a gentle reminder for a customer to complete their order when life gets in the way. 

We provide our studios with the capability of automated abandoned cart emails. Although they are simple in premise, they sure are effective. Yep, I said automated. Workflow without the work!

What is an Abandoned Cart Email?

Abandoned cart. Oh, the horror! That bundle of words can bring fear into any studio’s heart. However, when I say abandoned cart email, that’s a different story. An abandoned cart email will be sent to any customers with products in their shopping cart who have not completed one of these two actions: completed an order or cleared their cart. The email will wait four hours before sending and include a direct button link back to the shopping cart with the products still inside. Handy eh?

Here is one of our generic abandoned cart emails that has been tried and tested by many of our studios.

Your abandoned cart email workflow can also include a follow-up reminder which is sent four days after the initial to anyone who still has products in their cart and hasn’t completed an order or cleared their cart. So scoop up those extra sales and give customers the gentle tap on the shoulder they need!

Some Real-Life Evidence

The influence we have seen of abandoned cart emails on studio revenue is impressive. We believe an online shopping experience should never exist without an abandoned cart email. All the data you are about to see below is real; gathered evidence that abandoned cart emails are totally awesome. Take studio X, for example:

Over the spring season, around 54,969 abandoned cart emails were sent to some forgetful and distracted customers. Around 60% of customers opened the email. Of those customers, 30% opened the shopping cart back up, and 36% of those who clicked the link placed an order. That was the cumulative percentage of conversion rates for all those data nerds out there. The overall conversion rate was 6%. Before I hear you say, “6%?! That isn’t much”, let me put that into perspective. For this studio’s case, that 6% brought in 3,545 extra sales, which wouldn’t have occurred. Not using abandoned cart emails in parallel to your online shopping cart is truly leaving money and sales on the table. We would much rather you have that extra revenue safe and sound in your wallet.

Customize, Split Test, and Learn!

In past posts, I have briefly mentioned our split testing capabilities; well, here they are again. You can not only generate more profit using abandoned cart emails but also learn more about your customers. You can also split test different abandoned cart header images, button sizes, and email copy. Seeing as our abandoned cart emails are automated and ongoing, why not test on this stream of customers? You can determine what defines a winning email copy and set a time limit. Once the test is complete, the system will use the winner as the new email going forward. Learn about your customers through split testing to market to them better in the future! Click here to learn more about split testing. 

For some situations, abandoned cart emails aren’t the best protocol. Know of a client that is particularly sensitive to their parents/subjects being emailed? No problemo. We can set the abandoned cart email to ignore any customers linked to that specific client. So you can keep raking in those extra sales with other jobs and exclude the ones that would prefer no extra marketing. Customers can also unsubscribe, or opt out of marketing/abandoned cart emails anytime. Yay for options! 

If you want to learn more about our abandoned cart emails, I have great news for you! We have an upcoming webinar where we’ll explore the ins and outs of our abandoned cart emails. Make sure you follow us on our socials for the latest registration information.

The Importance of Backgrounds

Backgrounds: this can be a truly divisive feature option. Through our exposure to the industry, we have noticed a clear preference for the style of background depending on the demographic of the shopper. Lucky for Fotomerchant customers, the 36pix team has provided us with an extensive range of backgrounds to please the fussiest shoppers. I’m looking at you, Grandma.

Why Bother with Backgrounds?

If you have perused our recent national survey documentation, you may have seen some interesting findings about backgrounds. These are important to consider when you are kitting out your Fotomerchant background gallery options. So let’s start your introduction to Fotomerchant backgrounds here and get elbow deep in some data.

It is important to first lay down some demographic information from the 30K parents who completed our survey:

  • 99.7% were residing in the United States

  • 93.1% were Female identifying

  • 49.8% were 36-45 years old

Make of that demographic what you will, but keep this in mind when looking at the following stats. Half of these survey participants listed that 52.7% of their school photographers provide backgrounds.

Hold onto your seats. If you are a studio in the 47.3% percentile that doesn’t provide backgrounds, look at the graphic below. Yes, you are reading that correctly 81.1% of parents would like to see some backgrounds. I bet you are glad you clicked on this article now. First of all, you’re welcome; second of all, get some backgrounds!

Woah Woah! Easy there. Just because you have a bunch of backgrounds does not mean you should show them all. Have you ever stood in the supermarket, frozen by choice of cereal? Yeh, your shoppers have as well. Don’t freeze your customers with the paradox of choice. Show fewer backgrounds and make the shopper’s decision easy.

To help inform your decisions on which backgrounds to prioritize, we included a question about the type/style in our survey. As you can see below, basic colors were an obvious winner at 28.6% Textures closely followed this at 22.4%. What this data tells us is that sometimes less is more. Hence, simple, basic color backgrounds let the student be the star of the show. View the graphic below to see how other background options were scaled.

The demographic of the shopper can often influence the background they choose, which can vary from school to school. Why not do your very own split test with your backgrounds? Provide one school with some basic colored/textural backgrounds and another with more themed/school environment backgrounds. Using our handy reporting system, you can then analyze how often the backgrounds are added to the cart. Decipher the popular backgrounds depending on whether the shopper’s child is a senior vs. in a primary school. Let us know your findings; as you can probably tell by now, we are true data nerds!

36Pix

So, now you are as excited about green screen backgrounds as we are, let me introduce 36Pix. 36Pix has been providing us with new backgrounds so you can offer your customers some snazzy options. You can check out our webinar with 36Pix for more details about our partnership.

Here are some of the new premium backgrounds available to Fotomerchant customers:

How does this look within the shopping cart, I hear you ask? Click the video below to see these bad boys in action:

Play Video

The video above gives you a quick run-through of where to set up and view your green screen backgrounds. First, go into your media library on the left panel. You will see a background folder with some standard backgrounds. If you click the folder below, CloudCT Premium Backgrounds, you can view our premium backgrounds. This folder is updated throughout the season, meaning you can spice up your backgrounds regularly. Never a dull background day with us here! Stay up to date with the freshest styles and designs.


Adding backgrounds gives your shoppers a dynamic and visual experience. It allows them to sprinkle some personality into their print and create the perfect piece to sit in their family home. That’s what is at the heart of backgrounds, and it’s the customization to make their print feel more like their own. So don’t deny your parents any longer. Instead, provide them with backgrounds that warm their heart and widen their smile.

That’s a Knockout!

Behind every good background is a good knockout. To create a seamless transition of a student onto a background, use our knockout feature in Studio.

No, Jessica isn’t having a photoshoot on a beautiful autumn day; she is actually sitting on a stool in rainy Buffalo. :shushing_face: Behold the work of our magical AI knockout technology.

Click here to read a recent blog about how you can automate your background knockouts. Then, if you are still hungry for more, why not head over and watch our webinar about pre-order automation and the role knockouts play? Thanks for hearing me out about the importance of backgrounds; I promise you won’t regret adding some color and personality to your shopper’s carts.

Pre-Order Automation

If you use one of our direct fulfillment labs, say bye-bye to handling pre-orders via other systems. With our new pre-order automation feature, streamline your workflow and match orders to subjects in a fraction of the time. Become better and faster with our revolutionary pre-order matching.

Our wonderful head of customer success, Tearah, outlined the ins and outs of this exciting new feature in a webinar; click the button below to watch her in-depth explanation. While you’re here, I’ll run you through a high-level version of the fun tidbits covered in the webinar.

Smart, Automated Image Population

Are you using one of our integrated labs to fulfill your orders? Boy, oh boy, do I have good news for you. Using our AI technology, you are now able to automate your pre-order workflow, so you no longer need to manage pre-orders via other systems. We love a streamlined workflow! By setting an automated enabled session, you can see backgrounds dropped out in real-time and quickly flip between original and knocked out images. In addition, as shown in the webinar, you can review images with suspected eyes closed and verify the AI selection. The level of control you have over verification can all be customized in the session-specific settings. A combination of smart automated image population and easy verification process drastically reduces time spent on preparing your images for lab fulfillment, leaving you to spend more time on things that matter.

Another exciting aspect of this feature is the pose selection capabilities. This can be automated, or if you wish to select your poses manually, you can also easily do so. We have a default fallback option to choose the last image taken for automatic pose selection.

No better feeling than being organized! We bring that passion for folders and excel sheets into our tagging system. You can apply tag rules to group, sibling, or buddy photos and corresponding products. Our tagging system ensures that only group images are linked to group products. This can be set up within your sessions to whichever capacity you need. Never have incorrect photos linked to products sent to your integrated lab again. I haven’t even filled you in on the best part yet. Using our AI technology, have your group images automatically identified and added with tags, so all you need to do is verify. Now that’s what I call an intelligent tagging system! You can even set a threshold of how many individuals classify as a group, sibling, or buddy photo. Once this threshold number is met, images will be moved straight into the groups tab.

Matching Subjects to Pre-Orders

We are bringing workflow without the work to another level with our ability to match subjects and images to pre-orders. Yep, we heard you. That painstaking process of a human fulfilling orders outside the system has been rectified. Once you import the subject data and images, our system automatically matches the recorded pre-orders to the subject data. So, all you need to do is verify the linked orders to subject data are correct. Then, confirm or deny whether the system has got the matching right; this is usually pretty accurate unless a spelling mistake occurs in the data or order. Of course, if a spelling mistake does happen, we are all human; after all, you can easily amend the error and go on with your day.

Does this new pre-order automation sound perfect for you? Don’t be shy! Reach out to us to find out more. If you liked this little taster of pre-order automation, be sure to register for our upcoming webinar where Tearah runs you through everything I just covered in more detail. I’d recommend checking this out for more information on how cropping can be automated for pre-orders and much more. If you need a crash course into our studio platform as a whole, we have plenty more content for you to digest. You can access more webinars about our studio platform here.

Cart Features

It’s all about the bells and whistles! Customizing your shopping cart with features that promote sales is our jam: everything from promotional highlights, pop-ups, and countdown clocks to multi-child ordering. Make your shopping cart do the work for you, encouraging customer engagement and leading to more sales. I teased in an early customer cart tour this blog post, and here it is. Welcome to the deep dive into some of our favorite features you can use to jazz up your shopping cart.

Pop-Ups

Let’s begin! As soon as customers enter their cart, they are greeted by a pop-up. This pop-up feature is easily turned off/on depending on what you want to bring attention to for the particular session. This pop-up is an effective way of getting information to your customers as they need to close the pop-up to proceed. Divert their attention to any information or promotions you currently have in place. Please scroll to view some examples of how our studios have used this feature.

Banners

The next topic on the agenda is 3…2…1, the countdown banner! The countdown banner sits at the top of your page, with a live-moving graphic of those seconds ticking away. The customer is immediately hit with a sense of urgency. The duration of this countdown is determined when you decide the end date of the current stage that is active. Click here to learn more about stages. The countdown banner is a simple but powerful tool that reminds the customer that these photographs won’t be around forever! So they better act fast before their gallery is no longer online.

Multi-Child Ordering

Multi-child ordering, or as the cool kids call it, MCO, is a brilliant feature that allows parents to add all of their children’s orders to the same invoice. Of course, to do this, all the children must exist within the same session, and the parent must know each child’s access code. This is precisely why we include the access code in the initial gallery notification email; it allows parents to shop for their children in one order. You can see how this email looks in the customer cart experience blog post.

Let me now walk you through how this handy multi-child ordering feature works:

Promotional Products

Have a promotion running and want to bring attention to your offers? Or perhaps you just want to push a  product that hasn’t been selling so well lately. Look no further. In the Fotomerchant shopping cart, you can tag different products with eye-catching phrases to bring attention to the product, e.g., most popular, best value, don’t miss out. These simple tags work a treat in attracting the attention of the customer. 

Another handy little trick we have up our sleeves is the price drop feature. Everybody loves a discount, especially when the price is automatically lowered. Place a slightly higher price next to the actual cost with a slash through the old value. This feature is super effective and leaves everyone happy, your studio has potentially increased the customer order total, and the customer feels they have saved. We love a win-win situation!

To further bring attention to a product you want pushed, why not highlight it in the menu bar? Showing a product in the menu bar means that your promotional highlight will always appear there regardless of which page the customer may be on, packages, digital products, or BYO. This gentle reminder will follow the customer through their cart experience and hopefully result in them popping it in the cart. Dream no further; highlight your promotional products in a manner that leads to profit.

Locking/Unlocking Rules

On the final stop of my cart feature tour, I would love to introduce you to our brilliant locking/unlocking in-cart feature. The screenshot below is taken from one of our studios’ shopping carts. As you can see, this studio provides a free digital download to customers when they add specific packages to their cart. The add to cart prompt is faded out and unclickable until a package is added to the cart. Once the customer adds one of the packages, they can come back and also add this product. And yes, you guessed it, the linked product will also be removed if the package is removed from the cart. So don’t worry. We got you covered. Of course, you can use this feature for any combination of products; the free download product was just an example.

Thank you for exploring some of the nifty features we have to make your shopping cart shine. We believe that it is the little things that matter. Minor shopping cart changes can significantly improve revenue and customer experience. To learn more about our shopping cart functions, click here to read a high-level walkthrough of the cart.